Digital Photography & Imaging - Final Project
25/10/19 - 29/11/19 (Week 9 - Week 14)
Ahmed Yaman Ibrahim (0341119)
Digital Photography & Imaging
Final Project
LECTURE NOTES
Final Project
For this project, we are to create a dystopian/utopian "futurescape" by using separate elements from other images to create a landscape of our own, in a way that depicts our vision of what the future could look like. The final image is then to be animated on After Effects as well.
INSTRUCTIONS
FINAL PROJECT
I started off with sketches of the ideas I had in mind. My ideas mainly revolved around the idea that an apocalyptic event caused the urban areas of the planet to decline and deteriorate, and subsequently, nature had begun to take over once more. The imagery would essentially consist of dilapidated buildings and other urban elements being covered in greenery, as well as oversized trees and other sorts of plants in the background.
 |
| Fig. 1.1: Sketches 1 |
 |
| Fig. 1.2: Sketches 2 |
 |
| Fig. 1.3: Sketches 3 |
I also created moodboards for this idea as well as some for other ideas I had in mind that didn't involve nature as a theme:
 |
| Fig. 1.4: Moodboard 1 |
 |
| Fig. 1.5: Moodboard 2 |
 |
| Fig. 1.6: Moodboard 3 |
Upon consulting with Mr Martin, he approved the nature-based idea for me to go ahead with. I started off by gathering elements from images that I could use to create the landscape. I mainly searched for images of dilapidated buildings and other urban elements, as well as trees and plants. Below are some of the images I found, which I later used on the final image:
 |
| Fig. 1.7: Image 1 |
 |
| Fig. 1.8: Image 2 |
 |
| Fig. 1.9: Image 3 |
 |
| Fig. 1.10: Image 4 |
 |
| Fig. 1.11: Image 5 |
 |
| Fig. 1.12: Image 6 |
 |
| Fig. 1.13: First attempt |
I felt that this wasn't really going in a direction I wanted, so I started over and laid them out differently.
 |
| Fig. 1.14: Second attempt |
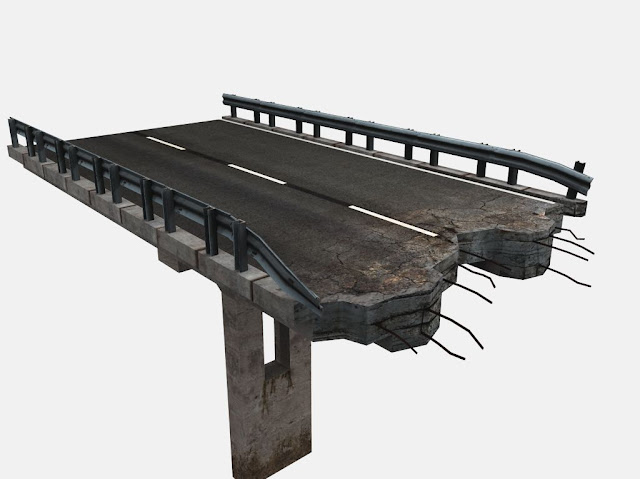
I felt this layout was a lot better than the first in terms of perspective and could be improved, so I went about adding more elements to it (both urban and nature). I also began to adjust the color for each element as I worked on them. Mr Jeffrey suggested that I adjusted the perspective of the broken highway so it matched the rest of the image, and I did so.
 |
| Fig. 1.15: Working on the landscape |
 |
| Fig. 1.16: Added final touches |
 |
| Fig. 1.17: Final Project part A - Still image final result |
I then imported the image to After Effects to begin animating it. I started off with what I felt would be the most difficult element to animate, which is the flowing water in the lower left part of the image. After looking at some online tutorials, I tried animating the water as particle effects, flowing down into the river below. This seemed to work, atleast in my eyes. I did this by creating solid layers above the waterfall areas and animating particle effects there to the size, shape and color of the waterfalls, with a bit of blur.
 |
| Fig. 1.18: Adding particle effects to the waterfalls |
I also added subtle ripple effects to the water above and below the waterfalls.
 |
| Fig. 1.19: Adding ripple effects to the water |
I then added subtle animations to some trees using the puppet tool to show that they were swaying slightly in the wind; I slowed down these animations based on feedback from Mr Martin. I also added a subtle animation for the deer in the foreground.
 |
| Fig. 1.20: Adding subtle movements to the leaves |
Finally, I added a misty effect to the foreground of the image by animating a moving cloud with low opacity. I added moving clouds to the sky as well.
Fig. 1.21: Final Project part B - Animation final result
*I noticed that the more subtle animations are not properly visible when viewing the video at lower qualities, so I suggest that it be played at 1080p quality.
FEEDBACK
While working on the still image, Mr Jeffrey suggested that I adjust the perspective of the broken highway as well as adjust the color to match the rest of the image. Aside from that, he said that the still image was good. For the animation, Mr Martin suggested that I slow down the movement of the trees, and I did so.
REFLECTIONS
Experience:
I enjoyed working on this project as it gave me a lot of freedom to explore the different ways I can create my landscape. The animation was somewhat frustrating to create, however, as most of the subtle animations required a lot of fine tuning. Overall, I had a lot of fun working on this project.
Observation:
As with the previous project, I noticed that there were several ways to make the same kind of edit, even more so on the animation. I looked up a lot of online tutorials on how to animate elements like water.
Findings:
I found that aside from the actual execution, it's important to have a clear idea of what you want to create for your landscape, ideally with some kind of backstory, as that will help make the imagery on your landscape stronger and more believable, if that makes sense.


